Fading a Shirt: A Step-by-Step Guide
Posted by ARTEMIO NERVEZ JR

Creating a faded look on a shirt can give it a stylish, vintage appeal that's both unique and personal. Whether you're looking to upcycle an old favorite or want to add a custom touch to a plain garment, fading it deliberately can achieve that sought-after, well-worn look. Here’s your step-by-step guide to fading a shirt, covering materials needed, the process itself, and some tips to ensure success.
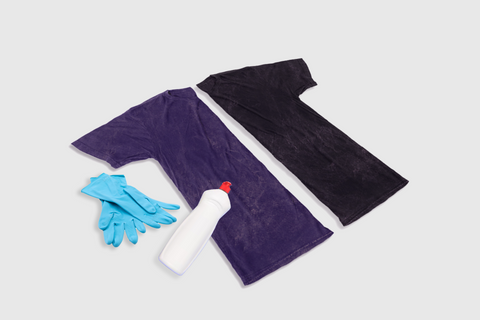
Materials Needed
- The Shirt: Ideally, choose a cotton shirt since cotton fades nicely and is easy to work with.
- Bleach: For a traditional fade, regular household bleach is your go-to. If you're looking for a more subtle effect, a diluted solution works well.
- Rubber Gloves: To protect your hands from the bleach.
- Plastic Bucket or Sink: A container that can be safely used with bleach and is large enough to submerge your shirt.
- Water: For diluting the bleach and rinsing the shirt.
- Measuring Cup: To measure out the bleach and water accurately.
- Stirring Stick: To mix the bleach and water solution evenly.
- Drying Rack or Clothesline: For air-drying the shirt after the process.
The Fading Process
- Preparation: Start by setting up your workspace in a well-ventilated area, ideally outdoors or in a room with open windows. Wear your rubber gloves to protect your hands from the bleach.
- Diluting the Bleach: In your plastic bucket or sink, prepare the bleach solution. A good starting point is a 1:1 ratio of bleach to water. For a subtler fade, you can use a more diluted solution (e.g., 1 part bleach to 3 parts water).
- Submerging the Shirt: Place the shirt in the solution, making sure it's fully submerged. You can use the stirring stick to push it down and ensure the solution covers it evenly.
- Timing: Leave the shirt in the solution for a specific amount of time. The duration will depend on how much you want to fade the shirt. Checking every 10 minutes can help you gauge the progress. Remember, the bleach will continue to work even after you remove the shirt from the solution, so it's better to err on the side of caution.
- Rinsing: Once you're satisfied with the level of fade, remove the shirt from the bleach solution and rinse it thoroughly under cold running water until the water runs clear, indicating that all the bleach has been washed out.
- Washing and Drying: Wash the shirt alone in your washing machine using a mild detergent and cold water to remove any remaining bleach residue. Then, air-dry it on a drying rack or clothesline rather than using a dryer to preserve the faded effect.
Tips for Success
- Test First: If you're unsure about the bleach concentration or the time it should soak, test the process on a small, inconspicuous area of the shirt or similar fabric scrap.
- Protect Your Surfaces: Bleach can damage many surfaces and fabrics, so make sure to cover any areas you don’t want to be bleached.
- Variations in Fading: For a more distressed look, consider applying the bleach solution with a spray bottle or sponge for varied texture and fading intensity.
- Safety First: Always work in a well-ventilated area and wear protective gloves when handling bleach.
Fading a shirt at home is a simple yet effective way to give your garment a new lease on life. With the right approach and a bit of patience, you can achieve that perfectly worn-in look that's both stylish and personal.
At VS TEES, transforming a shirt with a home fading technique is an uncomplicated and rewarding endeavor, breathing new vibrancy into your wardrobe essentials. Armed with the proper methodology and a sprinkle of patience, you can effortlessly craft that impeccably aged appearance that radiates both fashion and individuality.